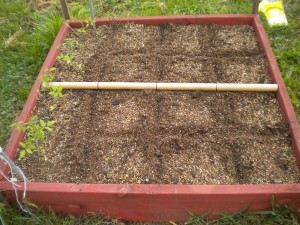
Square Foot Gardening Part 5

heart2

Today I thought I’d spend some time talking tomatoes. And trellising. There are three ways to manage tomato plants. Caging— putting a circular support around your tomatoes and allowing them to bush, staking— using a central stake to support your plant, and trellising— pruning them to vine up a trellis. We have always preffered trellising. Here’s why:

  • Trellising allows you to plant your plants closer together, thus improving your yield.
  • It allows you to reach and monitor the tomatoes better, as they are more visible.
  • It transfers more of the plant’s nutrients to the tomatoes, rather than to leaves.

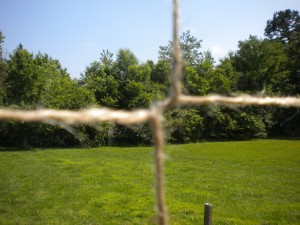
It is a bit more labor intensive. I have discussed earlier how to create a trellis frame for your garden. When you have it in place, you simply take a ball of twine or other light cord, tie it of near the base of one side of the frame,and draw it across to the base of the other side of the frame. Wrap it around once, then head back across at a slight angle. You should arrive back at the first side of the frame about 9-10 inches above your original knot. Wrap it around once again, then head back across. Repeat until you get to the top of the frame, then tie it off. You will need some vertical supports. I do two, each 1/3 of the way across. Tie off at the top of the frame, head down to the first horizontal string, then wrap your vertical string around it. head down to the next one and repeat. Do this until you reach the bottom, then tie off. Below you will see the wrapping technique, and the finished trellis.
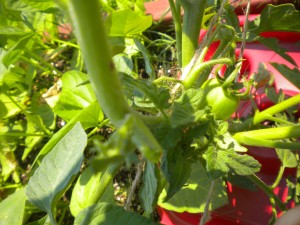
You can then begin feeding your tomato (or cucumber or pea) plants up through the trellis. Now for the  controversial part–pruning. Some are aghast at how radically I prune my tomato plants. But remember, you just need enough leaves for the creation of chlorophil. What your tomato plant really need to concentrate on is—wait for it–creating tomatoes! The leaves you want to remove are those that are especially large. My father used to call those “sucker leaves”. You want to remove them at the base, being careful not to remove any juncture which may produce a blossom or more vines. You can either pinch them off, or use scissors or pruning shears. I usually just pinch, because fingers are a tool you always carry with you. Below, you can see a before and after pruning moment.
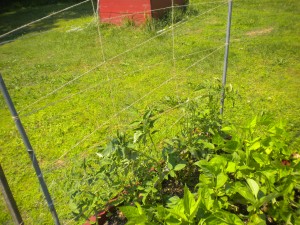
Remember, you want to find a balance between pruning and leaving enough leaves for the continued health of your plant. In the future i will post pictures as they grow to demonstrate pruning. The red flashes you see in the pictures to the right are called tomato trays. You insert them at the base of your plants to help regulate the amount of water that gets to the roots. This helps to prevent blossom end rot, which we had some trouble with last year.

Well, that’s about it for this time!See you all next installment.


Posted in From the Garden, Uncategorized | Leave a comment

Square Foot Gardening—Part 4

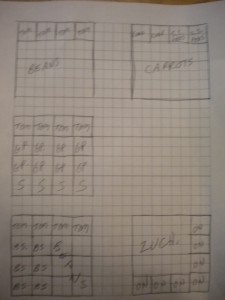
We’ve discussed creating, preparing, and designing your SFG. Planting is the simple part. You can either go with seeds or starts. Those plants that grow faster, have a shorter gowing season, or mature later, can begin wtih seeds. Just follow the directions on the package for best planting time and seed depth. Some plants require a longer time to grow from seed, and those you may want to either start yourself inside, or buy plants. Those might include tomatoes, green peppers, broccoli, onions, cabbage, among others. Below you can see the grid I prepared to plan my garden. I did wind up changing a few items, but seeing it on a grid helps you visualize.

Square Foot Garden Design Sketch

There are many sources onlline where you can print out any size grid graph paper. Then simply draw in your four-foot garden grid, divide into 16 squares, and you’re set to plan!

One more plant suggestion. If you are into organic gardening, as we are, a natural alternative to pesticides is the addition of certain flowers to your garden! One such are marigolds. Dedicate one square per box to one or more marigold plants, for a natural pest deterant!

Once everythig is planted, you will want to water everything in well. This of course gets them well on their way, and sets the seeds in place. One thing we have done in the past, and did not do this year (we are regretting that laziness), is to wrap your garden in chicken-wire fencing. Once your plants are heading towards maturity, you can remove it. You see, there are many animals that simply LOVE young plants, especially bean plants and lettuce. Others just love to dig into soft soil.

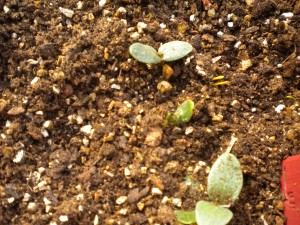
Now for the exciting part. Watching it grow! I just love seeing the young plants bursting through the soil, reaching towards the sun.

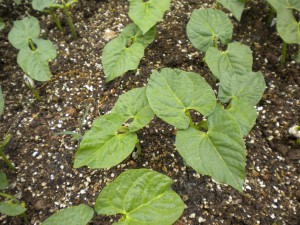
Getting bigger andd bigger!

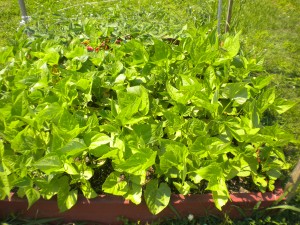
Until you have this! This box contains 12 squares of green lake bush beans, great for canning. They are aon the verge of blossoming. We had designed this box to have just nine squares of beans and three squares of brussel sprouts, but could not find any at the right time. At the back you can just see the four squares of tomatoes. Next time, we will discuss those more in depth and talk about trelllissing. See you then!

Posted in Uncategorized | Leave a comment

Square Foot Gardening Part 3

heart2

In this section we will discuss spacing of your plants, and how to accomodate them. Needless to say, different plants requre different space needs. This can be achieved through planting or thinning. Let’s start with those requiring the most space. This would include your vining plants, like squash (summer, winter, and zucchini). The require a space 3 squares by 3 squares, or nine squares total.

Some plants will require two adjacent squares. These include watermelons, cantelopes,  pumpkins,and smaller vining plants.

The next more densely planted scheme is those that require one square foot. These include tomatoes, peppers, okra,  everything from the cabbage family— including , of course, cabbages, broccoli, cauliflower,and  brussel sprouts (yum!).

This is followed by those plants requiring four per square. You can achieve this spacing by dividing the square in half in each direction with your finger, creating a plus-shaped shallow groove. Plant one seed or plant in each square you have created! The types of plants used here would be bush type lettuce like bibb or buttercrunch. Also garlic, corn, leeks.

The next more densely planted square is divided into 9 squares. You can achieve this by drawing a tic-tac-toe board into the square, creating 9 equal spaces. The type of vegetables going here will be bush-style green beans, beets, turnips, spinach, and onions.

This brings us to a square divided into 16 smaller squares. You can do this by dividing the square like you do the 4-per-square, then divide each square into 4. The plantings you will do here are carrots, radishes, smaller onions. Carrots and radishes have very tiny seeds. You may do what I do, which is to scatter the seeds over the square, then thin when they get an inch tall or so.

There are a few specialty plantings, such as peas and sugar snap peas, and cucumbers. These are planted 4 to 6 in a square, but since they will be trained onto a trellis, they are planted all in a row in the middle of the square.

Since this is just a beginning discussion, we won’t go into what plants go best with what plants. There are a few things to take into consideration here, though. When planning those plant that will need to be trellised, you need to consider how much daylight will get to the rest of the square. Also, be careful that your bushier plants won’t overwhelm you more delicate plants, such as lettuces.

A great and inexpensive trellis frame that we use is made from ellectrical conduit. It can be cut at your big box store (we use 6 foot long uprights and of course just under 4 foot ong crosspiece. You will also need a corner connecter, which is just screwed into place. Just screw the corners on,  set it into place , centering in the square at either end of the garden, and hammer it down about a foot or so. This will accomodate four adjacent squares. Later we will talk about stringing the trellis onto the frame.

More pictures from the garden next time! See you, and thanks for the comments!

Posted in From the Garden, Uncategorized | Leave a comment

Square Foot Gardening–Part 2

heart2

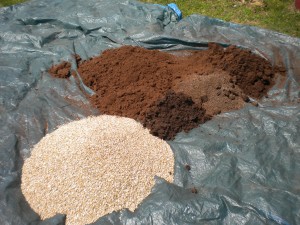
OK–so you’ve gotten the box built, it’s in place, and you’ve gotten landscaping fabric down. What next? Oh, yeah, dirt! But not just any dirt, and actually, not really dirt at all. We used what is called “Mel’s Mix” Here’s where things can get a bit pricey, but it’s a great investment in a great garden. You use a mixture of 1/3 vermiculite (this is a mineral which expands with the application of heat to become very porous. You see this a lot in professionally potted plants as a white, granular substance. You will need to go to a good farm and garden supply store to get this in any quantity. Your regular big box store will probably not carry it. What vermiculite does is hold water and keep the soil loose and aerated.), 1/3 peat moss, and 1/3 compost. Mel Bartholemew (see my previous post on square foot gardening) recomends trying for a blend of 5 different composts, because each will bring diffeent nutrients to the table. Some are more expensive than others. Black Kow and Black Hen are by far the most expensive, but oh, so rich in nitrogen. You can also get mushroom compost, forest compost, composted peat, and a host of others. You can also get horse manure from a local stable, but that’s smelly work and will need to be composted for several weeks before it’s usable. In a future post, we will discuss starting your own compost.

Vermiculite, Peat, and Compost On the Tarp

So now on to mixing! We found a great way to mix your garden soil elements. You will need an ordinary tarp, at least 12×16. Pour your elements onto the tarp near one corner, as you can see in the picture below. This works best when you have two people to share the work.
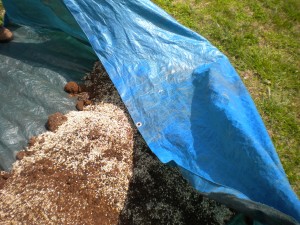
Now grab two ajacent corners of the tarp, dragging them across the tarp and pulling the soil with you as you go, something like the picture below:

Mixing the Mix


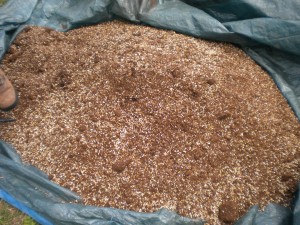
Then switch to the next two corners, dragging in a new direction. Then switch to the next two corners, dragging in a new direction. Then switch to the next two corners, dragging in a new—well, you get the idea. When you finish, your  mix should looks something like this:

Finished Blend

Now just drag the tarp over to the edge of your box and shovel it in, breaking up any big clods with your hands. The result will be the picture I put in my last post. Remember, never lean on or step in the square. You want your soil to remain light and aerated.

Some proponents of SFG want you to create a grid using wooden laths fastened down in a permanent structure. I think that’s silly and time and resource wasteful. I just use a stick marked off in 1 foot increments, and use a trowel or even my hand to groove the soil into a 1’x1′ grid, as per the picture below. You dont need to do this until the time you begin your planting.

Garden With Grid


You can see that I’ve already planted some tomato plants, so I’m getting a bit ahead of myself here, but next post we will discuss how many plants, sets, or seeds to plant in each square. We’re ready to grow! See you next time.

BTW, thank you all for your comments and feedback!

Posted in From the Garden, General | Leave a comment

Square Foot Gardening Part 1

heart2

We began square foot gardening several years ago as an experiment, after my husband read a wonderful book by Mel Bartholemew. The concept is that you create small, raised beds accessible from all sides without stepping or placing any weight on the planting area. The optimal size is 4 feet by 4 feet, which is what ours are. You fill these planters with a mixture of peat, humus, and vermiculite, and plant your seeds/ plants in beds instead of rows– by regular garden standards rather close together.The high concentration of nutrients and the fact that the soil stays very aerated and loose, creates high yielding gardens with low weed count.

We created our beds out of 2 x 12 lumber (do not get pressure treated wood, as these contain harmful chemicals), cut them into 4′ pieces, and screwed them together as you can see in the picture below. I know they are just under 4 x 4′, but this made for no wastage in the 8′ long pieces of wood that we bought. We then gave them a couple of coats of a good paint rated for the outdoors. They still won’t last forever, as termites do get to them after a few years, but this is an economical way to go. When you decide how many you want to deal with, place them in a flat (or as flat as you can get) area of your yard with optimal sunshine, making sure to allow enough space between them to allow for easy movement , and, if you so desire (and we do), a lawnmower.

You will then want to put a layer of landscape fabric over the bottom of your square. This will help keep weeds at bay. Remember, the gardening mix you’re going to fill these boxes with is very rich–and the weeds are going to say “yum!” until they are shouldered out by your plantings.

Garden Square Before Planting

The picture above show a square after the mix has been added, and a trellis frame inserted. Next time we will look at what planting mix is, how to make it, and how to prepare your boxes for planting!

Posted in From the Garden, General | Leave a comment

More about this site

heart2

A bit more about everything. I’ve named this website “Heart of the Home” after a beautiful song by the Celtic singer/songwriter Andy Stewert. When I get permission, I will post the lyrics to it. Some of my favorite things include sewing (until extremely recently, my twin sister and I ran a website business where we constructed and sold historical clothing), music (I am a church choir director), puttering in my kitchen, and puttering in my garden. I love the concept of square foot gardening, and so this year I am going to post ongoing pictures and information about it, beginning tomorrow!

I also am a bit of a student of historical cookery. As I feel we have much to learn from the past, from time to time I’m going to publish recipes from the past and discuss how they can be included on todays table.

My living room has words stencilled around walls near the ceiling. They kind of convey my philosophy. They’re from Shakespeare’s Romeo and Juliette. “This night I hold an old accustom’d feast, where to I have invited many a guest, such as I love: and you, among the store, one more, most welcome, makes my number more.” It pretty much means “come on in–let’s party!”

 I welcome your comments, and can’t wait to welcome you into my home!

Posted in Uncategorized | 2 Comments

Hello everyone–welcome to my brand-spankin’ new blog!

Glad you could visit for a while. Hope you can come back. I want to share with you some things that are important to me! My home, my family, and my life.

Posted in Uncategorized | Leave a comment