 So the garden is growing beautifully right now, and I thought we’d talk about something different today. Next weekend, we’re hosting a beer-tasting party, and we wanted to add a few different elements to it. We’re encouraging folks to bring their home-made brews. So we brewed three different kinds of mead. Mead is technically wine made from honey, but there are two different types of brewing techniques–short mead and long mead. Both use basically the same ingredients, but long mead has the alcoholic content of wine, and short mead is closer to beer. The terms “long” and “short” refer to fermentation times.
The three types of mead we made were metheglyn, pyment, and cyser. Metheglyn is mead with spices added. The spices we added were ginger and lemon (I know, not technically a spice). Upon tasting it, the ginger really came to the front, and made for a nice, light, summery drink. Pyment is mead with grape juice added. It takes on a lovely deep color, and really has more of a wine finish to it. Cyser is mead with apple cider added. It makes for a very crisp drink.
The process is quite simple. You need a bottle or jug with a small enough mouth to hold a cork with an airlock (these can be gotten online or at your local brewing and vintning store.). As the pyment and cyser were experiments, we just used gallon jugs. You will also need about 1 package of champagne yeast for every gallon of mead. This can also be gotten at your brewing store. Do not use regular bread-making yeast. For every gallon of mead, you will need about 2 pounds of honey.
The most time consuming process in mead making is refining the honey. To do this, put your honey into a 2 quart saucepan, with several cups of water. Bring the mixture to a simmer. As you can see in the picture below, a scum will rise to the surface.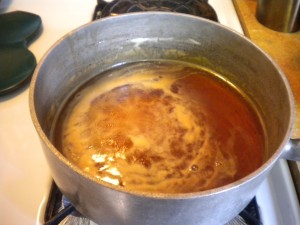 You need to skim off the scum.
To do this, I use a small hand-held sieve, the kind with a fine mesh. Run the sieve under the scum, lifting it out of the pot. as pictured below. Allow the liquid part to drain back into the pot, then rinse the sieve in a bowl of warm water.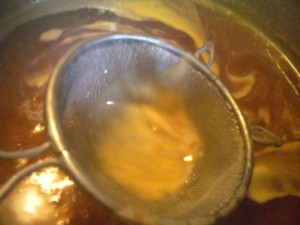
Continue this process until there is little or no scum visible. This removes impurities from the honey, and will keep your mead from being bitter.
At this point, you can remove the honey from the heat. Now it is time to add spices or other additions. If added before the mead is removed from the heat, you run the risk again of making your mead bitter. Some ingredients that are great to add are lemon peel and lemon juice, cinnamon, crushed nutmeg, ginger, cloves, grains of paradise, even peppercorns! Teabags, especially my favorite, Earl Grey, add tannin to the fermentation process and the Earl Grey brings bergamot to the party. Let these steep in the honey/water while the mixture approaches room temperature. You will want to strain these out before you put your liquid into the fermentation bottle. While this is happening, you can proof your yeast. In a small bowl (I use a mug), put about 1/4 cup warm water and your package of yeast. Stir to dissolve. Allow to set–you will see the yeast wake up and start to do its thing!
Be sure you have sterilized your container–the easiest way is to swish a clorine/water solution all around inside, then rinse well and allow to air dry. When your mixture is just warm to the touch, you can strain it into your jug. (see the picture below). 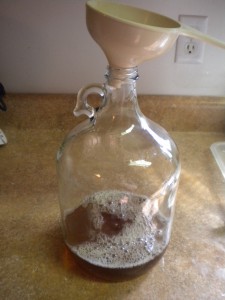 Now come the differences between pyment, cyser, and mead. If you are making pyment, fill your gallon jug the rest of the way to the top (allow two or three inches for excess bubbling) with grape juice. Be sure it is at room temperature, not straight from the fridge. If you’re doing cyser, do this with cider. If you’re doing straight mead, do this with room temperature water. Obviously the specific gravity will be higher for the pyment and the cyser. You can determine this if you have an instrument called a hygrometer. It looks a bit like a thermometer, and measures the density of your solution, which in turn will tell you the potential your solution has for producing alcohol. We measured our pyment and cyser as having the potential for 11% alcohol. OK, now add your yeast to the bottle, and wither swish the bottle around or insert a chopstick to give it a good stir. Now put on your fermentation lock. Again, these are available on line or at your local brewing store, being sure you have filled it with water. (See the picture below.)
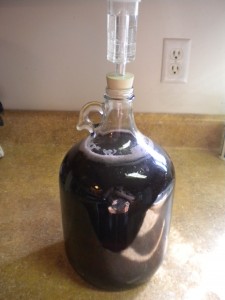
Now it’s just a waiting game. Try to keep your container away from direct sunlight, which could heat up the water too much, or from air-conditioning ducts, which could cool it too much. If you’re going for a short mead, you’re going to want to bottle it before it stops fermenting. We save non-screw top beer bottles and use a lever-style bottle-top crimper. Again, you an get these where you get your other brewing supplies. If you’re on a budget, save soda bottles and ther screw-tops. You will want to sterilize everything, same process as before. Just fill with a siphon and cap! Just a word or two here. If you want effervescence, you’re also going to had some precipitant in the bottom of the bottle (unless you do a siphoning into a second jug, and then immediately bottle.). We choose not to do this, and just decant from the bottle when we drink it.
We waited two weeks before bottling, which we discovered was just a bit too long. We tested again for specific gravity, and discovered that all the sugars had been converted to alcohol. When this happens, there are no carbs left to be converted to CO2, (the bubbles you see leaving the airlock. But everything is a learning experience, and we do have a lovely pyment and cyser, which with some aging will be quite nice. Our metheglyn is lower in alcohol, and the ginger has really come to the front. It’s a great summer drink served very cold, even over ice! We created our own label, which if you have access to a laser printer, can do up 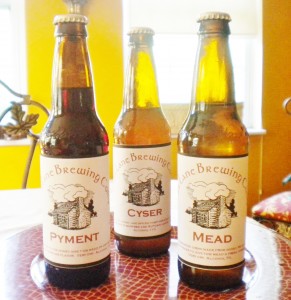 a smudge-proof label. See the picture below.
I hope you try some of your own mead. There are also other fruit juices with which you can mix your honey. By changing your fruit juice-to-water ratio, you can change your specific gravity, which will in turn change your alcohol level. By playing with your fermentation time, you can determine your level of carbonation. Its time to experiment, and the gratification is almost instant!
See you next time!

http://www.tryflexcin.com/ Thanks for that awesome posting. It saved MUCH time