Ember Day Tart

heart2

It’s kitchen time again. I apologize for the delay since my last posting. Life has gotten in the way, as they say. But today’s recipe is sure to pplease and has an interesting history. The recipe is Tart in Ember Day, or Ember Day Tart. Ember days occured during the medieval calendar four times  year, on the Wednesday, Friday, and Saturday of Ember week–once during each season of the year. They were considered fasting days, hence this recipe, which is meatless. Foods on the medieval table didn’t have the definite division that todays foods do, between savoury and sweet. This recipe is slightly sweet, even though it resembes  modern quiche. It’s a great way for children to sample new foods–simply point out the raisins to them. Because there are at least two versions extant, you can also do your own variations and still be reasonably sure you are serving an “authentic” historical dish. Here are the two original recipes:

Source [Ancient Cookery, S. Pegge (ed.)]: Tart in Ymbre day. Take and perboile oynouns presse out þe water & hewe hem smale. take brede & bray it in a morter, and temper it up with Ayren. do þerto butter, safroun and salt, & raisouns corauns, & a litel sugur with powdour douce, and bake it in a trap, & serue it forth.

Source [Forme of Cury in Curye on Inglish, Constance B. Hieatt & Sharon Butler (eds.)]: Tart in ymbre day. Take and perboile oynouns & erbis & presse out þe water & hewe hem smale. Take grene chese & bray it in a morter, and temper it vp with ayren. Do þerto butter, safroun & salt, & raisouns corauns, & a litel sugar with powdour douce, & bake it in a trap, & serue it forth.

Ember Day Tart

1 pie shell recipe (see my earlier posting on commodores)

2 medium onions

3 eggs

1 cup cream

1/4 cup raisins

1/8 tsp. cinnamon

1/8 tsp. nutmeg

Salt and pepper to taste

1/8 tsp. saffron (optional)

1 cup soft cheese, such as gruyere (optional)

1/8 tsp ginger paste (or powdered ginger)

2 tbsp. butter

2 tbsp. sugar

1 cup fresh parsley or cilantro (optional)
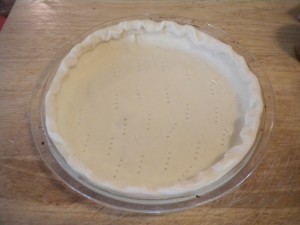
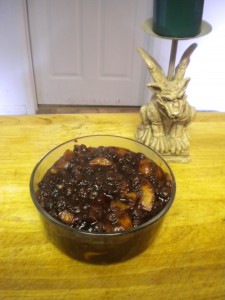
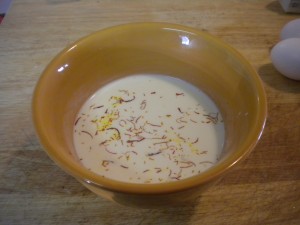
Roll out your pie dough and line a pie pan, crimping the edges. Preheat your oven to 350 degrees. Peel and chop your onions, not too finely. If you are using saffron, heat your cream in the mircowave or on the stove until just hot, then put in the saffron threads. Keep heating just until small bubbles form around the edges, then remove from the heat. In the picture below, you can see the saffron threads releasing their color into the milk.Saute the onions in the butter until soft and slightly golden. Spread in the pie shell. Sprinkle the raisins onto the onion layer. If you are using cheese, shred the cheese and sprinkle into the crust next. Break the eggs into a bowl and beat until foamy. Now you need to incorporate the hot cream into the eggs. While you are beating, add just 1/4 cup of the cream. When beaten together, add another 1/4 cup, beating constantly. What you are doing is raising the temperature of the eggs without causing them to cook prematurely. Keeps adding the cream 1/4 at a time until all is added. Now you can add the spices, the sugar, and if you wish, the parsley, chopped finely. Carefully pour into the pie shell. Bake at 350 degrees for 30 minutes, or until the center puffs up. (This shows you the eggs are completely cooked).
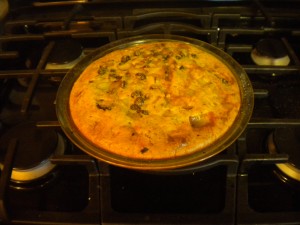
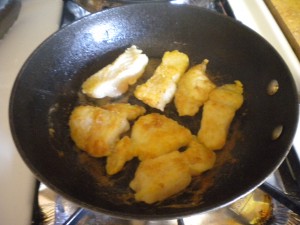
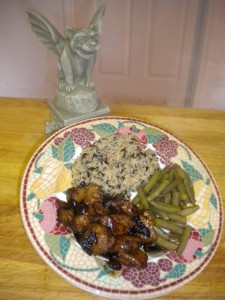
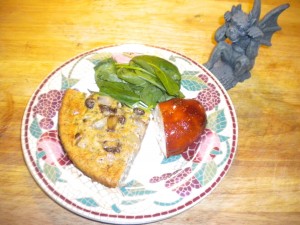
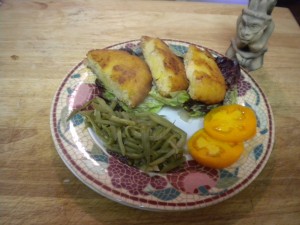
This recipe is a great side dish to most any meat, or great on its own, especially as a brunch item. I served it with a marinated, broiled chicken breast, and a baby spinach salad. I like to use ginger paste instead of chopping my own ginger, as it spreads the flavor out more evenly. It is available where you find asian specialties.


Just a few translations of the original recipes. Courans are currants. Traps, are of course, pie shells. Poudre Douce was a mixture of sweet spices, which we here have included as cinnamon, nutmeg, ginger, salt, and pepper.  Erbis were green herbs, which might have included, spinach, watercress, parsley, and other such mild greens.

Hope you enjoy this recipe, make your next meal a medieval flair.

See you next time!

Posted in From the Kitchen, General | Leave a comment

Gargoyles

heart2

I had mentioned in my last post my collection of “gargoyles”. I thought I would introduce a few of them to you today, but first a little history lesson. Most stone carvings people think of as gargoyles are not. True gargoyles are actually rain or run-off spouts for buildings and churches. The sit poised at the corners and eaves of rooftops with their mouths open to funnel the water away from vulnerable spots. The word “gargoyle” comes from the early French for “throat”, and some scholars think that it is actually a oenomatopedic word for “gargle”. The creatures that we see, with wings spread, gazing down so disdainfully at us are actually “grotesques”. Their presence has been debated by scholars, artists, and historians over the years, but the general concensus seems to be this: grotesques may have been placed by superstitious builders to ward off evil, both to the structure and to those inside it. Some people believed that they actually came to life at night, flying around an playing pranks. They were also used as both signatures by the masons and stonecrafters to sign their work, and also as private jokes by those same people.

Whatever their purpose, they are a charming and enigmtic addition to structures– mostly in England and France. My collection began with a kitchen magnet. My friends saw it, and decided that it must have companions. Over the years, very few of my creatures have actually been purchased by myself. Because of my interest in things historical, I have ventured to give my collection the names of saints, pairing their general appearance with the appropriate saint. You’ll see what I mean below. Not all of them have names. Some have defied all logic, and some only need a general description to keep their place.

 This first little guy is named after Saint Matthew, the patron saint of bookkeepers, bankers, accountants, and moneylenders. He is actually a bank. You can see him hovering over his money, keeping a wary eye out for borrowers and thieves.

My second fellow pictured here is modelled after the Beanie Babies. Because he is sewn together, I have named him after Saint Homobonus, the patron saint of tailors.

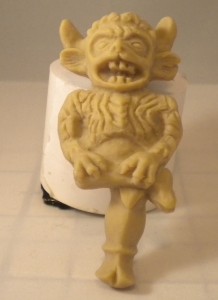
The groteque to the right has an interesting history. As you can see from the pictures so far, some of my collection are historical repplications, and some are modern whimsical adaptations. This one is definitely historical. My husband and I several years ago had the good fortune to go to England, and visited many churches and cathedrals there. In Lincoln, the cathedral has a grotesque called simply “the imp”. He is quite small and easy to miss, as he is up near the vaulted ceiling. Tradition has it that at night an imp from Hell would come to the cathedral and fly around, taunting the statues of the saints. As punishment, he was turned to stone and placed in the cathedral as a warning to other minions of Satan. Some say that at night he still comes to life and flies around. So this is simply “The Lincoln Imp”.

The creature to the left here is actually a true gargoyle. you can see how he is poised to spew water from a handy downspout. Spew is the operative word here. I have named him after the Saint Elmo, the patron saint of stomach disorders.

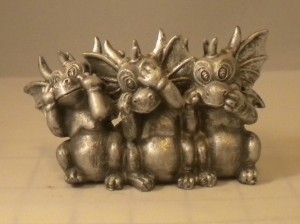
These little guys are so cute, they don’t need names. If you examine them closely, you’ll see that they are the grotesque version of “hear no evil, see no evil, speak no evil”. But they’re so cute, who would get annoyed being reprimanded by them?


OK–one more for now. This fella is very obviously a modern grotesque adaptation. He’s very studiously working on a laptop. He’s been named after the patron saint of lost causes, Saint Jude. I tell everyone he’s working on a Mac. It really gets my sister annoyed, as she is a dyed in the wool Mac person.

Well, I hoped you enjoyed the little tour. I apologize for some of the chopped pictures. I don’t know why my computer is doing this. I will correct them as soon as I can. I have many more gargoyles in my collection, and I’ll introduce you to them over time. Some are very unusual, in various media.

See you soon!

Posted in From the House | 1 Comment

Egardusye–Sweet and Sour Fish

heart2

It’s Medieval Day in the kitchen again. Today we’re going to be making Egardusye, which is a kind of fish stew. Actually, the term egardusye, or egerdouce, comes from two french words aigre-doux, which means “sour-sweet”, but have had various spellings over the years. It originated as a sort of sauce to put over meat, but this version, which comes from The Form Of Cury from the late 14th century, actually mentions fish as part of the ingredients. Below is the original recipe:

For to make egardusye: Tak Lucys or Tenches and hack them small in gobbets and fry them in oil de olive and seeth nym vinegar and the third part of sugar and minced onions small and boil altogether and cast therein cloves, maces, & quibibs and serve it forth.

Here is my version, redacted for the modern kitchen:

1 1/2 pounds firm fish, such as cod

1/2 cup flour

1/4 cup olive oil

1/3 cup cider vinegar

1/3 cup balsamic vinegar

1/3 cup sugar

1 medium onion, chopped

1/4 cup raisins

1/4 tsp. ground cloves

1/4 tsp. mace

Salt to taste

1/4 tsp. ground pepper

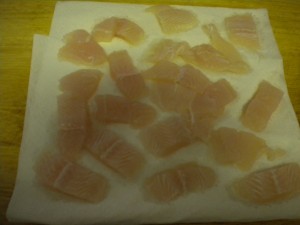
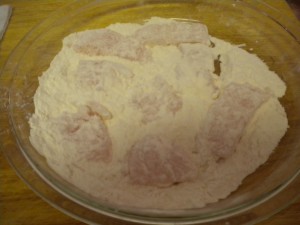
Cut the fish into smallish pieces–I usually make them about 1 x 2 inches. Put your flour into a flat pan, and toss the fish to coat. heat the oil in a frying pan, and brown the fish on both sides over medium high heat. Remove to a paper towel after browning. You may need to add additional oil as you fry, because of the flour.

Meanwhile, in a saucepan, heat the vinegar, sugar, and spices to  boil. Add the onions and cook until soft. Add the raisins and the fish, and cook for about 10 minutes, until the sauce has thickened and the fish is cooked.

Serve it forth!

I have actually combined two recipes here. The egerdouce recipes that are just sauces mention the addition of dried fruits. You will notice that the above recipe mentions the fish, but not the fruit. So I combined them both!  I also chose to use balsamic vinegar as part of the the mix because in part it adds a richness of taste and color, and in period the vinegar used would likely have been made from sour wine. You can either served this dish over rice, or on its own. The original recipe also does not mention the use of flour, but flour is a great way to develop a crust on the fish and get the sauce to adhere. This dish, like the other fish dish I have listed, is also a great way to get kids to eat fish.

I’m sure you have noticed by now the gargoyles that have cropped up in my pictures. I have a collection, and when they found out I was doing a blog, they insisted they be part of the process. More about gargoyles in a future posting.

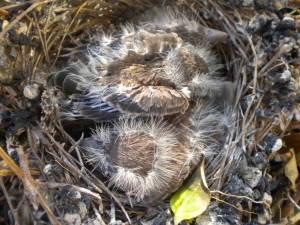
And now for the nature part of our day.  I posted a few weeks back about the birds nest that appeared on our front porch. Well, the three eggs grew to four, and the baby birds have hatched! Below, you will see the progress of my little adopted bird family. The momma bird is a house wren, a type of starling, and has tolerated my visits to her family. The hatchlings have now started to develop their adult feathers, and have their eyes open. Not often though, as they sleep quite a lot (as all babies do). So i have a difficult time getting pics of them awake.

Chicks about 1 day old!

Chicks about 1 week old

Chicks about 3 weeks old


See you next time!

Posted in From the Kitchen, Uncategorized | Leave a comment

Craft Day in the Dining Room

heart2

Today I thought I’d share a bit of crafting and interior design with you. My husband and I traveled to Italy a few years back, and as we totally fell in love with the country, we thought we’d keep a little bit of it close to us. Because I love to cook, that room had to be—the dining room! It took me quit a while to pick the color scheme, and even longer with color swatches taped to the walls to pick just the right colors. I ended up painting the walls a pumpkin/amber color. Then I got to work with a new, soft, 3″ wide paintbrush and some red glaze. The red effects you see on the walls are created with the brush dipped slightly into the glaze, then wiped almost completely dry. I worked along the ceiling line, into the corners, and along moldings, brushing the glaze on in various directions to crate the effect of smoke or dust gathering there (except that it’s red!). The trick is to keep the effect blotchy, not going for an even coat. I worked away from all the corners and edges, using an ever lightening touch. The main parts of the walls got just the tiniest bit of glaze.

It took quite a bit of time, but I worked just a small area at a time–and the effect was worth it. I was going for an outdoor trattoria look, very casual. I continued the look with shaped cafe curtains, and used the same fabric to cover the seats of my dining chairs. I actually used outdoor style furniture, in metal and glass, to continue the look.

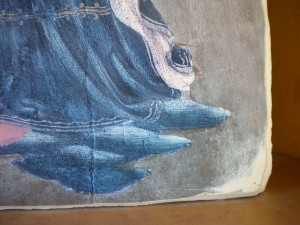
To further the Italian look, I purchased two prints of  paintings by Fra Angelico (my favorite 15th century artist). One I matted and framed the regular way. and with the other I tried something different. I got a scrap of plasterboard slightly larger than the print, trimming the edges with a matte knife to bevel them . I glued the print securely to the plasterboard. Now for the fun part. Using fine grit sandpaper, I sanded both the plasterboard, to get rid of any paper exposed, and the picture, to remove some of the surface–especially at the corners .I then lightly distressed the surface. My intention was to have this look like a piece of fresco, where painting was done directly on wet  plaster. After finishing with a coat of matte spray varnish, I leaned it on a small corner shelf. Here is the finished effect:


Then I added something very non-Italian, although maybe some people are unaware. I hung a tapestry reproduction on one wall. Tapestries were, and still are, mostly made in Belgium. But the theme of this particular tapestry is the making of wine. And since we do love wine and just below the tapestry is a wine rack, I thought it might be fitting. It also fills one wall of the dining room nicely.


We finished the room with a couple of photographs of our trip, in some frames that a friend gave us for our 20th wedding anniversary. Although the room is not big (12 x 14), it has a lot of light coming in from five windows, and really gives the feel of being out-doors. As we don’t have a deck, this is the closest we come to dining “al fresco”.


Our Dining Room

Here is  a walk-through movie of the finished room. I hope you enjoy it as much as I did creating it.

See you next time!

Posted in From the House, Uncategorized | 1 Comment

Square Foot Gardening Part 6

heart2

Hello, everyone. Thought I’d do a garden update today, and post some pictures. The beans are through, as are the zucchini, sugar snaps, and onions. The weird weather we’ve had around here this summer was not kind to the green beans, and the zucchini had a short growing season. Got some lovely elephant garlic however, and further into this post I’ll share a recipe I served last night. I cleared out the zucchini box, and have readied it for a second planting of beans.

Around here you can actually plant beans twice. We generally don’t get a frost until the middle of October, and that gives us almost a second 3 month growing season. When you plant bean seeds in July, you will want to plant them deeper than you do in the spring. Think 3 inches as opposed to 1 inch. This helps the seeds get the needed moisture for germination that they won’t get from soil nearer the surface.


Now here’s our carrots. They were planted in a double-height garden box. However, we planted the same type of carrots which would work well if they are planted in a single height box. They are Chantenays, and are a shorter, rounded carrot, but still full and really sweet. Don’t they look lovely grown the square foot garden way? Like a bouquet of ferns. I’ve already gotten a few dinners worth, and soon it will be canning time for them.

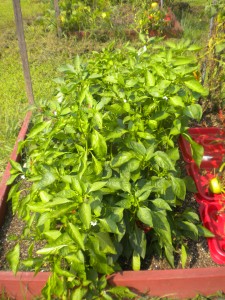
Now for the green peppers. They are growing like weeds! We’ve gotten some beautiful peppers, great for stuffing (I did). Soon I’ll have to start chopping and freezing them. Again, they look like a lovely bouquet of greenery!

The tomatoes have done well, also, but the weird weather has affected them somewhat. We’ve been getting our rain in huge chunks, with large expanses of nothing in between. But that’s OK. When I made stuffed peppers the other day, I was able to use our own tomatoes for the sauce, our own onions, and our own green peppers. It doesn’t get any fresher than that!

OK, here’s the recipe I wanted to share with you. It’s quite simple, in the traditional Italian way. Take a head of garlic, cut in half. Drizzle  little olive oil over it, and put it cut side up in the oven, loosely covered. Bake for about 45 minutes at 350 degrees. What I actually did was to bake the elephant garlic that I harvested, about 4 cloves. Cook your favorite pasta, about 4 ounces.  I used rigatoni just because I had some. When the garlic is soft, squeeze it into a bowl with about 1/3 cup of olive oil. Either whisk it together or use an immersion blender to homogenize the mixture. Salt to taste. When your pasta is done, toss with the garlic mixture. Add about 1/2 cup Parmesan cheese and toss again. This will serve bout 3-4 people as a side dish. I served it with a simple meat loaf and some carrots (from the garden, of course!)

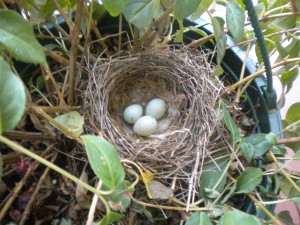
One last picture. I have several hanging plants on my front porch. They are fuchsias, and the weather had not been kind to them. They are bouncing back and re-blooming now, however. Anyway, I was watering them a week ago and discovered a nest in one! I thought it was a bit late in the season for nesting activity, and that it perhaps was abandoned. Much to my surprise, today when I watered, I discovered three eggs! I watered very carefully so as not to disturb them or chill them unnecessarily. Not sure what the parent bird is. I saw it flying away at one point, and maybe its a wren. Here’s the shot:

See you next time!
Posted in From the Garden, Uncategorized | Leave a comment

Another New Take on an Old Recipe–Luce Wafers

heart2

Here’s another in my series of period recipes great for the modern table. Historically, when an animal, fowl, or fish was killed, no part of it went to waste. This recipe is a great example of that practice. Luce refers to pike, and the parts that were used were referred to as “the womb”, meaning probably most of the innards except for the digestive tract. I know, not very appealing to the modern palate. This recipe for  Luce Wafers, or Luce Waffres, comes from Harleian Manuscript number 279, from the 15th century. Here is the original text:

Waffres. Take þe Wombe of A luce, & seþe here wyl, & do it on a morter, & tender cheese þer-to, grynde hem y-fere; þan take flowre an whyte of Eyroun & bete to-gedere, þen take Sugre an pouder of Gyngere, & do al to-gerderys, & loke þat þin Eyroun ben hote, & ley þer-on of þin paste, & þan make þin waffrys, & serue yn.

When you finish scratching your head, here is my interpretation for the modern table. You will note that I do not use fish “wombes”, but minced fish.

Luce Wafers

1 lb. mild fish, such as cod

1/3 cup flour

2 eggs. seperated

2 tbsp. sugar

1 cup finely grated cheese, such as cheddar, or if you want something milder, a gruyere

1/2 tsp. salt

1/2 tsp. powdered ginger

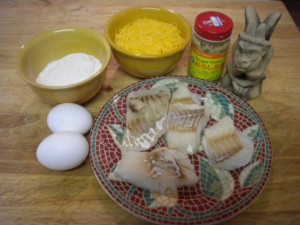
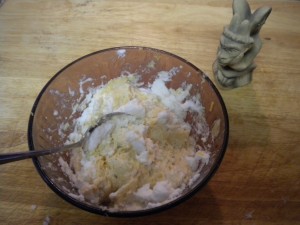
Here are the ingredients. Bake, steam, poach, or roast the fish until you can flake it with a fork. Cool until easy to handle, then mInce fine. Stir dry ingredients (flour, salt, ginger, sugar) together, then toss with fish. Add cheese and beaten egg yolks, stirring to coat. Now whip the egg whites until stiff. Add them to the fish mixture, 1/3 at a time, folding together carefully each time. The whipped egg whites will lighten up the mixture, and cause it to puff a bit when cooked. Below is a picture of the process of folding the egg whites into the mixture.


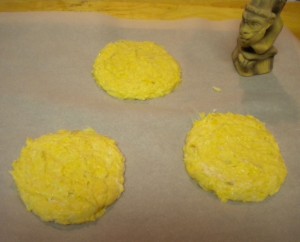
Now you’re going to make the mixture into patties. I use a hamburger press for this, lining it with plastic wrap and spooning it in untl it’s level. Then turn it out onto a pan lined with plastic wrap. This amount should make three patties. You’re then going to FREEZE IT!  Yup. That’s right. You see, the fish is already cooked, so you don’t have to worry about not getting done. Freezing the patties will make them ever so much easier for the next step. Below is a picture of the patties ready to go into the freezer.


When the patties are firm to the touch, heat about an inch of oil on the stove over medium high heat. You’re going to want to monitor the frying, as there is cheese involved.  Be sure the first patty is well started before you add the second one, as they are going to cool the oil when they’re first placed in it. Better yet, fry them one at a time. They don’t take long. When one side is lightly browned, carefully turn over. Check often, as they will brown fast. Remove from the oil, drain on paper towels, and enjoy. Thiis recipe serves 3.


  These are a great way to get kids to eat fish. If you feel you really  need to have a condiment, try adding capers and just a touch of lime juice to some mayonaise.

Now allow me to digress for a bit and get on my soapbox. There is a letter you wll not recognise in the above recipe. It resembles the letter “p”. In some manuscripts it is actually written as an upside down “y”. This letter is called a thorn, and it is pronounced as a “TH” sound. The letter has dissappeared from our modern alphabet, but some lazy calligraphers have looked at it in its upside down “y” form, and assumed it was just a “y”. Here is where you get all your ‘Ye Olde Corner Anything”.This is just one of those mis-conceptions and misusages that just grates my bacon. OK, off my soapbox.

See you next time!
Posted in From the Kitchen, General | Leave a comment

Be a Volunteer

heart2

So I wanted to digress a bit from my usual postings, and talk a bit about volunteering. I know President Bush’s “Thousand Points of Light” is a dim, dark memory, but the difference you can make in someone’s life is simply unarguable. Several years ago I volunteered to take over heading up our church’s food ministry at a local homeless shelter. Our commitment is only once every 7 or 8 weeks, one meal for about 200 people. I have a background in cooking for large groups of people, both through my sister and my catering company and through my historical cooking for the Society for Creative Anachronism.  What apalls me is that it took me so long to realize that I needed and was needed to do this. I plan the menu, do the shopping, and herd the volunteers who show up to help. What a wonderful feeling of fulfillment! I’ve met so many wonderful people, caring and also needing. It’s in that way that we help each other. I’ve given, but I’ve also received.  The fact that you can make a difference in someone’s life by just being there, showing someone that you care about them, and making their quality of life just a little bit better.

There are so many organizations that need help. Hospitals, shelters, nursing homes, teen centers, most cities nowadays actually have clearing house centers that help point you in the right direction if you tell them what your skills and interests are. And it doesn’t have to be a huge committment of time. Think about what you have to offer, that might help out someone in need. It might be something as simple as doing a few loads of laundry for a shelter that doesn’t have a washer, or reading letters to an elderly person who doesn’t have much eyesight left. You see–you can do this!

OK, now for something completely different. We just got a rain chain and I wanted to show it off a bit. It replaces your downspout, allowing the water from your gutters to flow down a series of vessels which slow down the speed of the water flow. In our case, they will be ending in a rain barrel, with a specially designed hose attachment which will allow me to fill up a watering can! I’m going to create a bungee cord system which will attach the bottom of the chain to the barrel, keeping the chain from swinging in the wind. The chain is solid copper, and will patina beautifully over time. I’m so excited over the effect that I think I will get another one to put at the other end of the house, thus bracketting the house in copper. I had not planned this, but my porch floor is actually a coppery melon color, so everything coordinates! And that’s a Burning Bush seen behind the chain, which soon will be turning a lovely coppery-red color. (It’s already started). I love to sit on our deep front porch when it rains, and seeing and hearing the rain chain is going to add to that.

OK–one more thing. About 8 months go, we adopted a rescue kitten. She’s black with just the tiniest bit of white on her belly. As a kitten she was more brown than black, thus earning the name “Cocoa”, because she looked like bittersweet chocolate. She’s now blackblackblack, so her name hs changed to “Coco”, after the designer Coco Chanel. We caught her in an amusing position the other day–not sure why she was sitting like this.

Come on–life’s too short not to share the love, and the laughter, too. Think about what I said about volunteering. You won’t regret it.


See you next time!
Posted in General, Uncategorized | Leave a comment

Commodores–a New Old Dessert

I’m going to be looking back at history for some new recipes to post here. Commodores have a long history, having been known by several different names over the years. They are fun to make, and of course fun to eat. their modern counterpart are “Fig Newtons”, those cookies that are filled with a fruit paste. Below is one recipe from the fifteenth Century, Called “Rhyschewys“. other names for this dish are Rapyes.

Take Fygys, & grynd hem smal in a mortere with a lytil Oyle, & grynd with hym clowys & Maces; & þan take it vppe in-to a vesselle, & cast þer-to Pynez, Saundrys, & Roysonys of Coraunce, & mencyd Datys, Pouder Pepir, Canel, Salt, Safroun; þan take fyne past of flowre an water, Sugre, Safroun, & Salt, & make fayre cakys þer-of; þan rolle þin stuf in þin hond, & couche it in þe cakys, & kyt it, & folde hym as Ruschewys, & frye hem vppe in Oyle; and serue forth hote.

Fun to read, but kind of hard to understand, huh? Well, below is my version of this dish. The recipe above only mentions figs, raisons, dates, and various spices, but since there are so many recipes for this dish, you can use the dried fruits you can find.

Commodores

1/2 cup each of figs, dates, dried apples, prunes, and raisons

1/2 cup red wine

1/4 tsp cinnamon

1/4 tsp nutmeg

1/3 cup honey or white sugar

1 cup water

Grandma’s Pastry Dough

Combine all ingredients except pastry dough. Cook gently over medium heat for about 1/2 hour. It will help if you have a heat diffuser to keep the fruits from scorching. Mixture should be thick, almost stiff. Remove from heat and cool slightly.To the right is how your mixture should look when it come off the stove. Place into a food processor  and pulse until mixture is the consistency of mince pie filling. You should still be able to see individual pieces of fruit, but they will be quite small. Now let’s back up a bit. while your fruit filling is cooking, you can make your GRANDMA’S PASTRY DOUGH! This is, needless to say, my grandmother’s recipe. It is a sure-fire, never miss, easy to make, pie crust. Here we go:

Grandma’s Pastry Dough

1/3 cup BOILING water

2/3 to 3/4 cup shortening

2 cups all-purpose flour

1 tsp salt

1/2 tsp baking powder

Place shortening into a bowl and pour water over it. Using a whisk (my grandmother used a fork, but she had arm muscles of steel), and beating very fast, incorporate the water into the shortening. You should end up with a mixture the consistency of mayonaise. Sift the dry ingredients into the bowl, and stir just until all ingredients hold together. Wrap with plastic wrap and refrigerate.

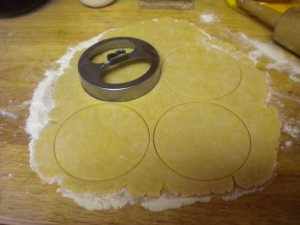
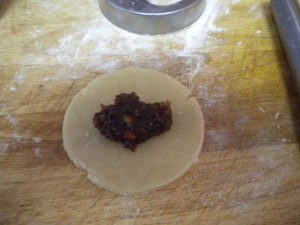
When your pie dough is chilled and your filling is finished, it’s time to assemble. On a floured board, divide your dough in half, and roll out 1/2 of the dough until it’s about 1/8″ thick.  Using a 3′ cookie cutter, cut as many rounds as you can. You can collect scraps and re-roll–just remember, the more you work your dough, the tougher it’s going to be. Now, take one circle of dough, place about a good tablesoon of the fruit mixture into the center, and wet the edges. Fold the tart in half, pressing the edges to seal.


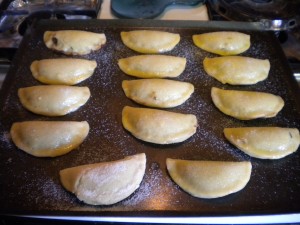
I keep a small cup of water for this purpose where I am working. Be sure to remove the circle from the rolling area before you start the edge wetting process, or you’re going to have a sticky mess on your board. Again, I usually do the sealing process in my hand, to keep things from sticking to my board. Place your tarts on a baking sheet. You can bake them retty close together, as they are not going to expand.  When you are ready to bake, brush the surfaces with egg wash (one egg yolk mixed with about one teaspoon of water).

Sprinkle with sugar, and bake for 10 minutes at 425 degrees. Reduce the heat to 350 degrees and bake for another 20 minutes. Allow to cool in the pan. One recipe of pie crust will make about 14 pasties, so you will have some fruit mixture left over to experiment with! You can also make this dish as open-topped tarts, spreading some of the fruit mixture on top of little pie shells. Just remember, the tate of the fruit is intense, so a little goes a long way. This also is a great topping for toast or biscuits, or thinned just a bit would be a great topping for bread pudding. You will find many uses for this remarkable filling. You can also add the pine nuts mentioned in the period recipe–just add them after you have put the mixture through the food processor.

Have fun, add a little history to your life.

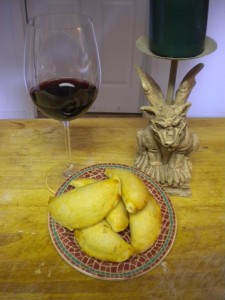
 Have them with a nice glass of something slightly sweet, perhaps a sauterne.


See you next time!
Posted in From the Kitchen, Uncategorized | 2 Comments

Homemade Crackers

heart2

Our beer tasting went very well–we served over 20 beers, including several home brews. To keep everything as personable as possible, I made and served homemade crackers! They were a hit, so I thought I’d share them with you. Well, of course you can’t taste them, but here’s the next best thing–the recipe! I’m not sure where the recipe originated, but I received it from a friend of mine in Chattanooga.

Cracker Bread

5 1/2 to 6 cups all-purpose flour

1 package dry yeast

1 tbsp. sugar

1 1/2 tsp. salt

2 cups warm water

1/3 cup softened butter

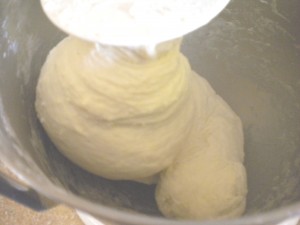
Combine yeast, sugar, salt, and 4 cups of the flour in your stand mixer bowl (if you have a mixer with a dough hook). Add the water and butter. Mix, adding the additional flour until you have a dough that does not stick to the sides of the bowl. Continue working for two to three minutes. See picture below.

Remove the dough from the bowl. clean the bowl, grease the sides, return the dough to the bowl,cover with a towel, and place away from drafts. Let rise for about 1 1/2 hours–until it doubles in size.

 Punch down the dough, let it rest for 10 minutes, and then divide the dough into 10 uniform balls. If you have a pasta attachment for your mixer, this next part is easy and fun. If you don’t it just takes a bit more elbow grease. You’re going to roll out the dough into thin sheets. If you have a pasta maker, start at 0 and continue feeding your dough through until you have worked down to 5. If you’re doing it by hand, continue rolling until you have your dough about 1/8 of an inch thick. (thinner, if you can manage it). Needless to say, the thinner your dough, the crispier the cracker is going to be.

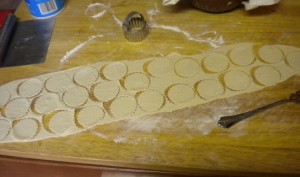
Now you get to decide what shape your crackers are going to be. You can be all natural, and bake your crackers in long sheets, breaking them up when they cool. But I like to use a cutter, to make the uniform and a little more formal. Below is a picture of the cutting process. I used a 2″ cutter–your crackers are going to shrink a little as you transfer them to your baking sheet, and these made for a nice, bite-sized cracker.

Now transfer them to your baking sheet. You’re going to want to line your baking sheet with either baker’s parchment or a silpat (you know, those silicon baking sheets). You can bake the crackers pretty close together, as they really are not going to spread. Prick them with a fork a few times so that they don’t develop bubbles as they bake, and dust them with salt if desired, patting down slightly to make the salt stick. Bake at 350 degrees, for about 17- 20 minutes, depending on the shape and size of the crackers. Keep watch during the last few minutes, as they will turn from almost done to really too brown very fast! You want them just slightly tanned on top. When they’re done, transfer them to a wire rack to cool and dry completely.

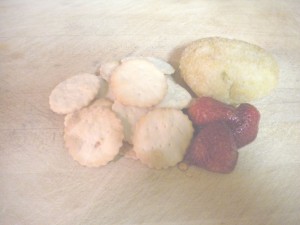
I know this seems like a lot of work for “just a cracker”, but here’s where you can get original. For my crackers, I added 1 cup of Parmesan cheese, and slightly reduced the amount of flour. I then used freshly ground sea salt to top them with! You can use any herb combination. You can even substitute other liquid ingredients for the water, including tomato juice or V-8, wine, beet juice (why not?). Think garlic and white finely grated cheddar. If you use a cheese like cheddar, you want to watch the baking process closely, to keep your crackers from burning. Use creative cookie cutters for festive holiday crackers. Just be sure that you don’t use cutters with lots of projecting bits, as these might tend to turn to brown during baking. Anyway, here’s the finished product!

Have fun, go crazy, impress your friends. Life’s too short to drink cheap beer or cheap wine, eat storebought crackers, or never pick up a good book.

Let me leave you with this quote my sister found.

“Whoever drinks beer, he is quick to sleep. Whoever sleeps long, does not sin. Whoever does not sin, enters Heaven. Therefore, let us drink beer!”

                                                     Martin Luther

See you next time!
                                            

Posted in From the Kitchen, Uncategorized | Leave a comment

Making Mead While the Sun Shines

So the garden is growing beautifully right now, and I thought we’d talk about something different today. Next weekend, we’re hosting a beer-tasting party, and we wanted to add a few different elements to it. We’re encouraging folks to bring their home-made brews. So we brewed three different kinds of mead. Mead is technically wine made from honey, but there are two different types of brewing techniques–short mead and long mead. Both use basically the same ingredients, but long mead has the alcoholic content of wine, and short mead is closer to beer. The terms “long” and “short” refer to fermentation times.

The three types of mead we made were metheglyn, pyment, and cyser. Metheglyn is mead with spices added. The spices we added were ginger and lemon (I know, not technically a spice). Upon tasting it, the ginger really came to the front, and made for a nice, light, summery drink. Pyment is mead with grape juice added. It takes on a lovely deep color, and really has more of a wine finish to it. Cyser is mead with apple cider added. It makes for a very crisp drink.

The process is quite simple. You need a bottle or jug with a small enough mouth to hold a cork with an airlock (these can be gotten online or at your local brewing and vintning store.). As the pyment and cyser were experiments, we just used gallon jugs. You will also need about 1 package of champagne yeast for every gallon of mead. This can also be gotten at your brewing store. Do not use regular bread-making yeast. For every gallon of mead, you will need about 2 pounds of honey.

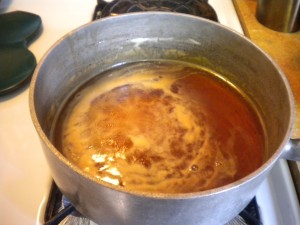
The most time consuming process in mead making is refining the honey. To do this, put your honey into a 2 quart saucepan, with several cups of water. Bring the mixture to a simmer. As you can see in the picture below, a scum will rise to the surface. You need to skim off the scum.

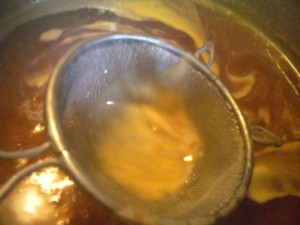
 To do this, I use a small hand-held sieve, the kind with a fine mesh. Run the sieve under the scum, lifting it out of the pot. as pictured below. Allow the liquid part to drain back into the pot, then rinse the sieve in a bowl of warm water.

Continue this process until there is little or no scum visible. This removes impurities from the honey, and will keep your mead from being bitter.

At this point, you can remove the honey from the heat. Now it is time to add spices or other additions. If added before the mead is removed from the heat, you run the risk again of making your mead bitter. Some ingredients that are great to add are lemon peel and lemon juice, cinnamon, crushed nutmeg, ginger, cloves, grains of paradise, even peppercorns! Teabags, especially my favorite, Earl Grey, add tannin to the fermentation process and the Earl Grey brings bergamot to the party. Let these steep in the honey/water while the mixture approaches room temperature. You will want to strain these out before you put your liquid into the fermentation bottle. While this is happening, you can proof your yeast. In a small bowl (I use a mug), put about 1/4 cup warm water and your package of yeast. Stir to dissolve. Allow to set–you will see the yeast wake up and start to do its thing!

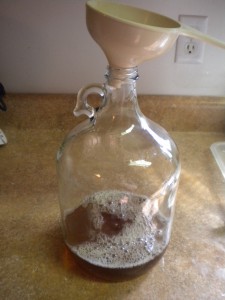
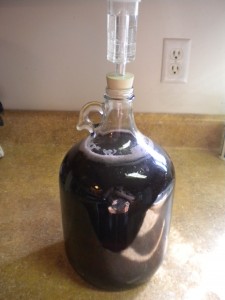
 Be sure you have sterilized your container–the easiest way is to swish a clorine/water solution all around inside, then rinse well and allow to air dry. When your mixture is just warm to the touch, you can strain it into your jug. (see the picture below).  Now come the differences between pyment, cyser, and mead. If you are making pyment, fill your gallon jug the rest of the way to the top (allow two or three inches for excess bubbling) with grape juice. Be sure it is at room temperature, not straight from the fridge. If you’re doing cyser, do this with cider. If you’re doing straight mead, do this with room temperature water. Obviously the specific gravity will be higher for the pyment and the cyser. You can determine this if you have an instrument called a hygrometer. It looks a bit like a thermometer, and measures the density of your solution, which in turn will tell you the potential your solution has for producing alcohol. We measured our pyment and cyser as having the potential for 11% alcohol. OK, now add your yeast to the bottle, and wither swish the bottle around or insert a chopstick to give it a good stir. Now put on your fermentation lock. Again, these are available on line or at your local brewing store, being sure you have filled it with water. (See the picture below.)

Now it’s just a waiting game. Try to keep your container away from direct sunlight, which could heat up the water too much, or from air-conditioning ducts, which could cool it too much. If you’re going for a short mead, you’re going to want to bottle it before it stops fermenting. We save non-screw top beer bottles and use a lever-style bottle-top crimper. Again, you an get these where you get your other brewing supplies. If you’re on a budget, save soda bottles and ther screw-tops. You will want to sterilize everything, same process as before. Just fill with a siphon and cap! Just a word or two here. If you want effervescence, you’re also going to had some precipitant in the bottom of the bottle (unless you do a siphoning into a second jug, and then immediately bottle.). We choose not to do this, and just decant from the bottle when we drink it. 

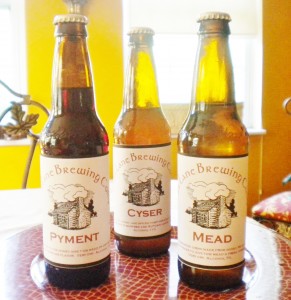
We waited two weeks before bottling, which we discovered was just a bit too long. We tested again for specific gravity, and discovered that all the sugars had been converted to alcohol. When this happens, there are no carbs left to be converted to CO2, (the bubbles you see leaving the airlock. But everything is a learning experience, and we do have a lovely pyment and cyser, which with some aging will be quite nice. Our metheglyn is lower in alcohol, and the ginger has really come to the front. It’s a great summer drink served very cold, even over ice! We created our own label, which if you have access to a laser printer, can do up a smudge-proof label. See the picture below.

I hope you try some of your own mead. There are also other fruit juices with which you can mix your honey. By changing your fruit juice-to-water ratio, you can change your specific gravity, which will in turn change your alcohol level. By playing with your fermentation time, you can determine your level of carbonation. Its time to experiment, and the gratification is almost instant!

See you next time!
Posted in From the Kitchen, Uncategorized | 1 Comment